salt & pepper shrimp – tôm rang muối

Tôm Rang Muối - Salt & Pepper Shrimp

my grandfather appreciated food.
likely, too much.
upon further reflection
i cannot decide what he loved more:
the sweet or the savory.
let’s say he liked both,
and the everything in between.
he enjoyed all the bad things that caused
his cholesterol to spike:
sunny side up eggs
liver, specifically my grandmother’s homemade pâté
seafood, in particular fried and heavily salted

this week marks a year since his passing.
in the last 12 months,
at the most random moments,
i will turn to dw and say:
oh gpa would love this dish!
or
gpa loved him some spice and salt.
more often than not
my memories of him are about food.
in memory of him,
i made one of his favorite dishes,
a dish we grandchildren would sneak to him
as it was something gma would expressly forbid him from having.

Tôm Rang Muối - Salt & Pepper Shrimp

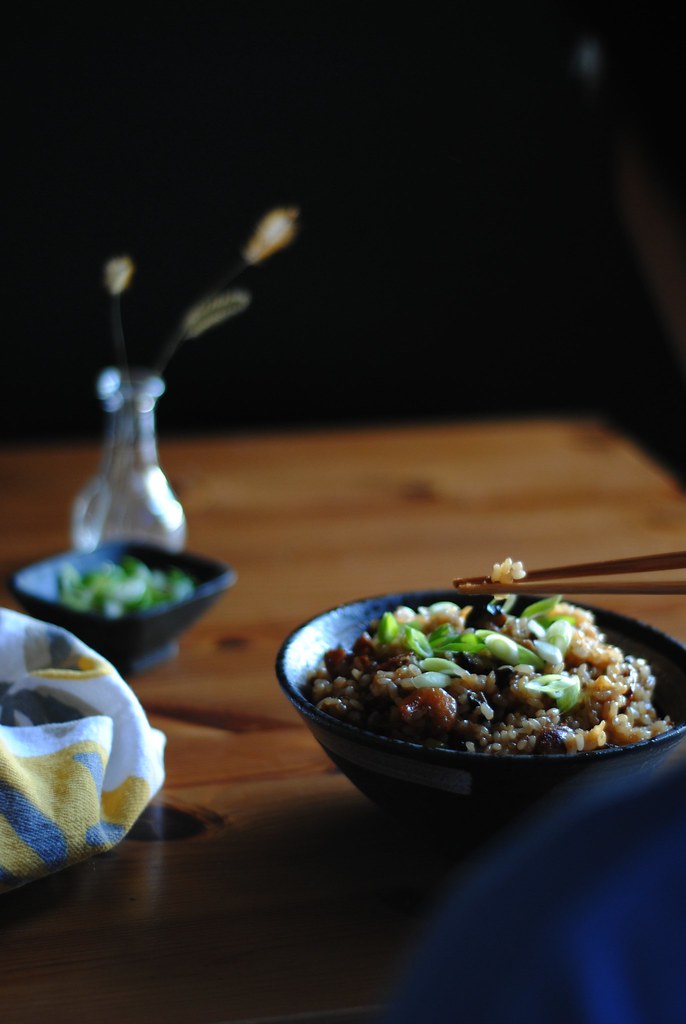
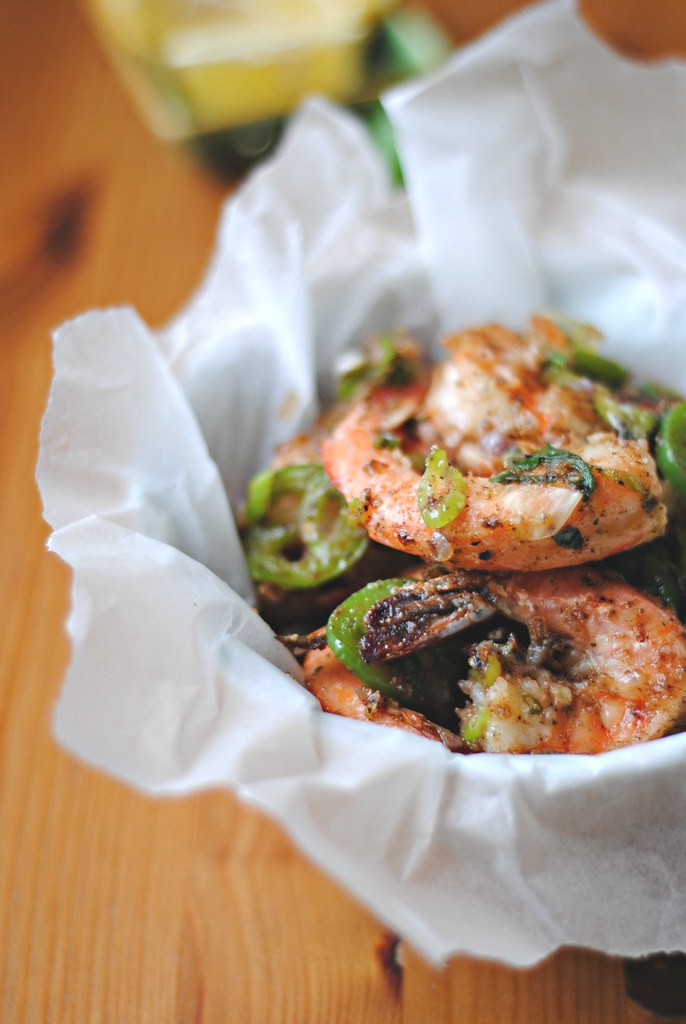
tôm rang muối – vietnamese salt & pepper shrimp
adapted from Luke Nguyen

*note: this is inauthentic, in that i did not deep-fry the shrimp. click on the link if you want to make it the “correct” way. i broiled them super quick in the oven. to keep the shrimp on the side of under-done, i worked quickly, make sure your mise-en-place is done accordingly.
**note: also, this dish is best with head on but the local Whole Foods doesn’t carry it. asian markets will carry head on prawns, but it’s not guaranteed organic and/or sustainably caught.
***note: this is a finger food, meant to be consumed in a group, with ice-cold beers and plenty of napkins. which is why, dw and i ate with a side of carrot+celery salad and brown rice, with chopsticks.

1/2 lb prawns, with head on, or in our case, large shrimp, cleaned/deveined, careful to keep shell on
2 tsp kosher salt
2 tsp fresh ground pepper
1 tsp five spice powder
1 tsp sugar
1/2 cup give or take corn starch or potato starch
3 cloves of garlic, minced
1/2 jalapeno, sliced
1/4 red onion, diced
2 green scallions, sliced on the diagonal
drizzle of oil
lemon or lime wedges, optional

first, preheat oven to highest it’ll go, broil or in my case, 550F.

next, prep everything and have all the ingredients ready to go. clean/devein the shrimp. there were some shrimps that lost their shell because i was a little indelicate but it was a price i was willing to pay to not eat poop. wandering chopsticks has a pic tutorial you can refer to. pat dry the shrimp.

dry roast the salt, ground pepper and 5 spice powder. (NOTE: you will not be using ALL of the blend in this recipe). set aside to cool. when cool, mix in the sugar.

line a shallow cookie sheet with foil or parchment paper. if using foil, oil it. dust the shrimp with potato or corn starch. or you can do it my lazy way, holding by the tail, dip the shrimp into the starch and shake semi-vigorously to let loose excess powder. lay on the prepared sheet. broil in oven for TWO MINUTES.

meanwhile, in a frying pan, heat up a drizzle of oil on medium high. saute the garlic, onion, green scallions and jalapeno. you’re aiming for fragrance, not so much burning or caramelization. this can be anywhere from 3-5 minutes. which means, in the middle of this sauteing you’re doing, you need to take the shrimp out of the oven. make haste. set aside the shrimp. when the onions and garlic have softened, add in the shrimp. WORK QUICKLY. sprinkle the shrimp with a few teaspoons of the salt/sugar/pepper/five spice mixture. (i ended up using 3 teaspoons, season to your taste). gently mix everything, heating the shrimp through. REMOVE from heat. this step should take 2 minutes, 3 minutes TOPS.

the end result should be on the dry side, unless you’re like me and gpa and got a little generous with the drizzle of oil.

serve with lemon or lime wedges.

BAM!

Tôm Rang Muối - Salt & Pepper Shrimp

last year’s gpa post: citrus curd mille-feuille
1 year ago: spiced coconut pecan ice cream
2 years ago: portuguese chicken curry with chorizo + olives

seaweed sushi bites

Sushi bites

in lieu of our staple winter soup/stew/chili this week
i made a finger food for our lunch
it was not warming
or even thoroughly filling
(though, it’s not like it left us starving after consumption)
it made me realize that
i apparently harbored some kind of
HOPE in my heart for spring,
seeing as how it’s MARCH.
but no.
the sky is still shitting.
you know what henry rollins said about hope:
“Hope is the last thing a person does before they are defeated.”
i’m pretty much defeated,
friends,
with this cold weather.

Sushi bites

seaweed sushi bites
adapted & inspired by thirsty for tea
makes about 27 balls. i have a 1.5 TBL ice cream scoop, whereas bonnie used a 2 TBL cookie dough scoop

*note: bonnie has a great recipe write up so head there for detailed instructions. i just winged it and it worked out.
**note: i made this sunday night with the intent of it being our lunches for monday and tuesday. monday was fine, but by tuesday the rice had gotten hard and dried, despite being covered. so ideally, halve the recipe if you’re not able to eat right away or just be pigs and eat it all at once.
***note: i call these bites, when you wait for the last second like i do to have lunch you shove stuff in your mouth cus you’re hangry, no matter how big. if you’re a civilized person, it’s actually two bites.

2 cups of sushi rice, cooked according to package or machine instructions, and cooled slightly
2 TBL seasoned rice vinegar, i use the marukan brand
furikake: homemade mix of shredded seaweed, sesame seeds, black sesame seeds, and salt

topping options:
thin sliced avocado
thin sliced cukes
smoked salmon

cook the sushi rice according to package or machine instructions. we’re a lazy folk and we rely on our rice maker to do the measuring and cooking for us. i know.

allow the rice to cool a smidge before drizzling with the seasoned rice vinegar. also sprinkle on the fuikake. gently mix through . (honestly, i wasn’t very gentle…just make sure the rice doesn’t break)

lay out a piece of plastic wrap. lay your sushi topping in the middle of the wrap.

wet your hands with a little bit of cold water. you may want to keep the ice cream scoop in the cold water too, it keeps the rice from sticking.

scoop out the rice and mold into balls. lay it on top of your topping that’s on the wrap. gather the plastic wrap around the ball tightly.

remove from plastic wrap and finish the rest.

garnish with a bit of the fuikake, for a kick.

serve immediately or as soon as possible, with soy sauce.

BAM!

Sushi bites

other sushi option:
quinoa sushi rolls – vegan and gluten free

soy sauce egg noodle bowl

Soy Sauce Egg Noodle Bowl

today is the first day of
the Year of the Sheep.
if that means nothing to you,
it just basically means
it’s the Lunar New Year.
these noodles are a symbol of
long life (hopefully).
may this year be a good one:
health
wealth
luck
happiness
happy new year friends!

Soy Sauce Egg Noodle Bowl

soy sauce egg noodle bowl

*note: i didn’t include serving amount etc because that is at your discretion. the yaki soba noodles that i buy come already portioned out and normally dw + i can put away 3 portions. oink. or rather, baaaah. (that’s the sound of a sheep right???!)

4 medium-hard boiled eggs, peeled
3 TBL dark soy sauce
3 TBL thin soy sauce
1 TBL sugar
2 star anises
3 cloves
water

fresh yaki soba noodles
chinese broccoli, cut in thirds
hot chili oil, store bought or homemade
green scallions or chives, to garnish
fried shallots and garlic, to garnish, very optional (and not pictured)

soy sauce eggs:
prepare your eggs, or medium or hard boiled, peel. set aside.

this is the most unscientific way: in a pourable glass measuring cup add the soy sauces and add enough water to equal 1 cup. add to a small saucepan along with the sugar, star anises and cloves. bring to a gentle boil and stir until sugar is dissolved. remove from heat and cool to room temp.

using a tall jar that would fit the 4 eggs and submerge them fully in the soy sauce mix. ignore at least 4 hours and up to 5 days.

noodle bowl prep:
halve the eggs

in a pot boil some water. loosen the noodles for less than a minute in the hot water. portion out. add a tablespoon or so of the egg soy sauce to fully coat the noodles. if you’re feeling fancy, add some of the hot chili oil and coat.

par-boil the chinese broccoli and portion out accordingly. top bowl with egg halves, garnish with chives or green scallions (and fried shallots and garlic, if using) and hot oil.

BAM!

Soy Sauce Egg Noodle Bowl

other asian and new year goodies:
chinese egg tarts
savory sticky rice
sweet potato mochi cakes
turnip cakes
scratch off lottery tickets
waffle cone fortune cookies

chinese egg tarts

Chinese Egg TartsChinese Egg Tarts

i’ve been watching
PBS’s The Great British Baking Show
every monday
(our sundays were taken up
with Football or the Walking Dead)
sure, i realize the series aired
during the summer
across the pond,
i’m upset about things
that have blown over already
but that doesn’t stop me from
taking to twitter
to wax poetry about
all things #GBBO
have you seen it?
who are you rooting?

Chinese Egg Tarts

Chinese Egg Tarts
dough adapted from Use Real Butter

*note: i made these tarts mainly to see if i could, because we so very rarely go to dimsum. i’d say it’s a great dairy free option, a little time consuming, with two types of dough to work with. the lunar new year is a week away, these would make a great addition to the 15 3 day feast that usually takes place to celebrate all things new.

water dough
1 cup AP flour
1 cup whole wheat flour
5 TBL lard
10 TBL water
1/4 tsp salt

fat dough
1 cup AP flour
5 TBL lard

egg custard
4 egg yolks
1/2 cup sugar
1 1/2 cups full fat, lactose free milk (i used organic valley)
pinch of salt

preheat oven 350F.

to make the water dough, mix all the ingredients in a bowl. mix it until smooth, let stand for 20 minutes covered with a damn towel. roll into log and cut into 20 pieces. set aside, covered.

to make the fat dough, mix all the ingredients until smooth. don’t be stressed, it will be crumblier than the water dough. roll into a log and cut into 20 equal pieces, them into small balls.

to make the pastries, first roll out the water dough piece, flatten into a disk about 3″. put a fat dough ball into the center of the disk and wrap the ball completely to make a ball. now flatten it again, rolling it out about 4″ long. fold it into thirds, turn 90 degrees and flatten/roll out again 4″ long. fold into thirds, turn and flat out, though aim for a circle/disk this time, about 4″ wide (or however big your molds are. mine were about 3″) line a mold with the pastry dough, crimp edges. do this for the rest of the dough.

to make egg custard: in a sauce pan heat up the milk very very gently. add the sugar and salt and mix until completely dissolved and incorporated. take off the heat. in a bowl with the egg yolks, very gently pour in a ladle of the warm sweet milk, all the while stirring the yolks. you don’t want to scramble the yolks, add another ladle for good measure, stirring continuously. finally, add in the rest of the mixture, stirring constantly. if you want, strain through a sieve, though i’ll tell you i didn’t bother. set aside until ready to fill pans.

when ready, fill the pans with the custard filling, about 3/4 of way up, don’t overflow it.

bake 30-35 minutes.

these will keep in fridge, covered for a week, though they taste best the day made, about 20 minutes out of the oven.

BAM!

Chinese Egg Tarts

update:
i was included on the worktop recently, a lovely roundup of other lunar new year goodies.

savory sticky rice

Savory Sticky Rice

did you guys see
Fresh Off the Boat last week?
i don’t like the show
(it gives me a vague sense
that i’m being side-eyed
and laughed at)
there was one scene
that rang true:
the lunch scene.
it was common that my lunch
consisted of
whatever was leftover
from the dinner table the night before.
which you can imagine,
while super tasty at home
did not translate in the school cafeteria.
i got side eyed
and one time
an entire table left,
after making a fuss.
that was high school.
(specifically, freshman year,
2nd semester where i was the NEW KID,
fresh from ethiopia
and in deep culture shock,
as an ASIAN AMERICAN IN AMERICA.
wtf?)

anyway,
this particular dish
was something i brought to school
in third grade.
i was so excited.
i was too young to realize that
pb&jelly sandwiches were de rigueur
and when i busted this sticky rice
out of its wrapper
and offered it to my bff
she wrinkled her nose.
i was crestfallen,
though i rallied and figured:
more for me.
(just kidding.
i threw it away)
but thus began my
battle with home brought lunches.
the struggle was real people.

Savory Sticky Rice

xôi or 糯米饭 no mi fan, or, Savory Sticky Rice
from memory, and a combination of woks of life and le jus d’orange

*note: nowadays, i have an office i can hide in if my food is on the strong side, though i do err on the side of safe foods. (there was that one time, years ago at another job, i brought dumplings and the odor caused my coworkers to pause. i was so embarrassed.) you won’t ever find fish in my lunch box. this, thankfully, did not disrupt anybody’s olfactory senses the week i brought it for noshing.

3 cups of brown sticky rice, soaked overnight
5 lap xuoung links, chinese pork sausage, sliced on a diagonal
3 garlic cloves, minced fine
2 cups worth of fresh shiitake mushroom caps, (reserve the caps in a freezer bag to make stock), sliced
1 cups worth of dried wood ear mushroom, sliced (reconstituted in hot water)
1 cups worth of enokie mushrooms, cut in half
2 cups of liquid, you can use stock for flavor or leftover water from soaking the mushroom, or just water
1/2 dried shrimp, reconstituted in hot water
4 stalks of green onions, sliced on a diagonal, divided, half to cook and half for garnish

sauce:
light/thin soy sauce
dark soy sauce
shaoxing wine
sesame oil
oyster sauce

night before, soak the rice.

when ready, prepare your mis en place:
for the sauce, refer to the links for exact measurements. i won’t lie, i winged the proportions and guessed on amount. basically, shoot for a tablespoon of each, except for the sesame oil. mix it all together and taste, add more of whatever you want until you reach desired flavor. you’re aiming for salty sweet. add in the sesame oil last, my guess: about 1/2 TBL. set aside.

have all your components ready sliced/minced/soaked and close at hand. strain the soaked rice.

in a large skillet, cook up the lap xuoung, it is going to give up so much fat. don’t be alarmed. when sufficiently cooked through, remove from pan onto paper napkins. pour out excess oil/fat, leaving behind about a tablespoon. throw in a handful of sliced scallions and garlic, mix. next add in the mushrooms and dried shrimp, and mix. remove from heat and last, add the rice and sauce. mix it all thoroughly together.

transfer entire contents of the pan to a rice cooker. we have a fancy rice cooker that has a STICKY RICE feature. if you’re incensed that i’m using a rice cooker, or you don’t have a rice cooker with that feature, or you want something more authentic, refer to the links of the original recipes for those instructions.

add in two cups of liquid (we used a combo of water and leftover mushroom water) and set timer accordingly. i think it was done after about an hour.

when cooked through, adjust seasoning to taste. serve garnished with leftover green scallions.

BAM!

Savory Sticky Rice

other asian delights, or stank food:
vietnamese bò kho – beef stew
Vietnamese Vermicelli Noodle Bowl {bun thit ga nuong}