homemade thai iced tea

Homemade Thai Tea

it was a much anticipated week —
one that would bring
joy & laughter,
likely some self examination
(indeed, much reflection)
along with ample weather indecision:
storms & sunshine abound!
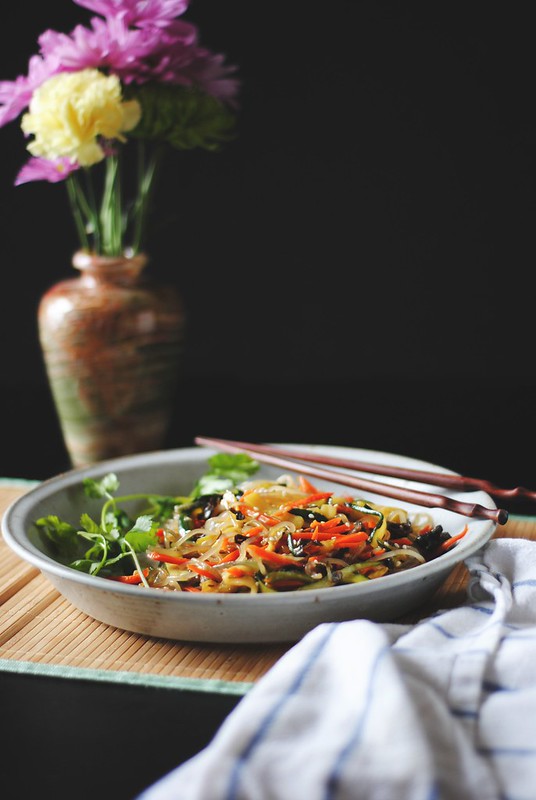
for 7 days dw & i hosted
our nephews,
jewel of boys,
long limbed and boisterous,
sweetly affectionate (still.)
(ps. please always be affectionate.)
infinitely curious
boundlessly active.
and so to add to all that frenzied energy
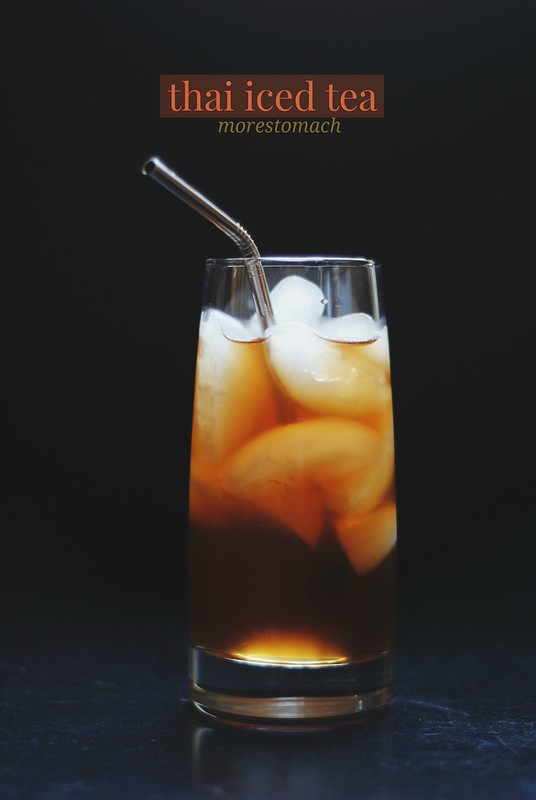
i made thai iced tea
because you know,
adding caffeine + sugar to all that
seemed like a good idea.
plus, it’s one of Q’s fave beverages.

thai iced tea

thai iced tea
serves 2-3

note: i am not a tea connoisseur, so i emailed a new fave blogger, Bonnie of Thirsty For Tea for some tips. bless her heart, she was so patient with my incessant questions. under her tutelage i bought the tea from teavana, because the three regular cafes and supermarkets i went to didn’t have what i was looking for. also, don’t be alarmed that the finished product doesn’t have a neon orange hue to it. i did all the freaking out for you. i was worried that i messed the recipe somehow. apparently, thai restaurants and cafes/shops that serve thai iced tea use a mix or add the color artificially. i didn’t know, now i do, and so do you. you’re welcome.

4 cups water
4-6 tsp thai black tea
3-4 tsp simple syrup (just water + sugar, i keep this on hand always in the fridge)

i brewed the tea in my coffee press. bring water to a boil. meanwhile, measure out the desired amount of tea. the package says 1-1.5 tsp for every 8oz/1 cup. i didn’t want too strong of a drink, as Q is only 12 and i’m not sure about giving kids too much caffeine or whatever.

pour boiled water into press carefully. allow to steep for 2-3 minutes. i may have let it go for 5 minutes, i was busy making dinner. carefully press down the plunger. pour the tea into a carafe or in my case, a jar. allow to cool. refrigerate.

to serve, fill a glass with ice. pour tea about 2/3 of way. sweeten with simple syrup to taste, top with half/half or non-dairy milk.

BAM!

Homemade Thai Tea

intense strawberry coconut ice cream & almond waffle bowls

Strawberry Ice Cream + Almond Waffle Cones/Bowls

friends,
i’ve been crazy about
strawberries
we went an entire week,
ok technically only 5 days
of banana-strawberry smoothies:
that splash of almond milk
maybe a handful of baby kale if i think of it
and because i like it freezing cold
and a little icy
and a little thick
maybe a handful
(or two)
of ice cubes
all blitzed in the vitamix
we inhaled the strawberry pavlovas
(and i’m still thinking about them)
(so much so that might have to make them again very soon)
we’re also gonna
have to make another trek to
the strawberry patch
cus we’ve consumed the 14+ pounds
we picked two weekends ago
all this to say
that we made strawberry ice cream
which is kind of pedestrian
to share on a food blog,
i know
it’s straight forward
simple
with a plain egg custard base
mais, alors
the pink hue
the tartness
in fact,
the intense tartness
that can only be described for
the first picks of the season
all encapsulated in this frozen treat
and because it’s such
a basic flavor
i made waffle cones & bowls
not so pedestrian of a post after all!

Strawberry Ice Cream + Almond Waffle Cones/Bowls

intense strawberry coconut ice cream & almond waffle bowls or cones

this recipe uses the yolks i used for the pavlovas. it pays to have a plan sometimes. additional notes at end of recipe.

6 egg yolks
3 cans of coconut milk
1/2 cup sugar
1 TBL potato starch
2 cups of strawberries, washed & quartered or halved
zest of 6 lemons, divided (the lemons were used to make this simple syrup)

for the strawberries, vitamix them until smooth as possible. it’ll equal out to about 1 1/2 cups liquid. reduce down in small saucepan on low heat, throwing a few healthy sprinkles of lemon zest. you’re aiming to get as much liquid/moisture out of the mixture as possible, leaving behind a thick sauce. i reduced it down to about 1/2 cup – 3/4 cup — basically until i got tired of babysitting it.

for the ice cream base, it’s my usual egg custard base. in a medium saucepan add in 2 1/2 cans of coconut milk, reserving the remaining for later. heat up the milk with the sugar until fully incorporated. add in a few healthy sprinkles of lemon zest. in a small bowl, separate your eggs. whisk the yolks, and then with a ladle pour in the hot coconut milk all the while whisking the yolks. this is tempering the yolks so it doesn’t scramble. if you want, add in another ladle-full. then slowly add in the warmed through yolk mixture into the saucepan, still whisking. you want the mixture to be fully incorporated. keep the heat on medium and keeping mixing until the mixture has thickened, about 10-15 minutes. at this point, with the remaining half can of coconut milk stir in the potato starch, then add mixture to the custard. this will thicken the custard even more, while also preventing full on ice crystals from forming when the ice cream is in the freezer.

remove custard from saucepan and allow cool. cover and refrigerate for a few hours, ideally overnight. same thing with the strawberry sauce.

when ready, pour custard base into ice maker and churn, then add in the strawberry sauce. churn according to manufacturer’s specs.

*note – technically, you could mix the strawberry sauce and custard before adding to the machine but it seemed like a whole lot of mixing and we figured the machine was well capable of doing that step for us. we opted to pour the custard first because there’s a lot more of it than the sauce, and there’s always a thin layer of ice cream along the edge of the canister that is difficult to scrape out when frozen. we figured we could “waste” that layer of mainly custard rather than of the strawberry sauce.

Strawberry Ice Cream + Almond Waffle Cones/Bowls

almond waffle bowls or cones
this round made about 4 bowls and two good-sized cones. best to consume day of, but if not, store in very air tight and dry container.

i bought our waffle cone maker TWO SUMMERS ago and we used it ONCE. oh for shame. my beloved adores ice cream and this is one contraption we cannot allow to gather dust!

2/3 cup almond flour
1/4 tsp salt
2 eggs
2 TBL honey
2 TBL coconut oil, melted

in a vitamix, blitz everything until smooth

heat your waffle cone maker to #3. pour batter into it, aim for 1/4 cup (let’s be smart, eyeball it and try not to get greedy) and cook for about 2-3 minutes. check on it after 1 minute, aim for a nice golden brown shade. very quickly and carefully peel the waffle out with a small spatula and shape over a bowl or cup, or into a cone. allow to cool.

a trick: i added a few chocolate chips in the bottom of the cone, the residual warm of the cooking melted it a bit and it created a stopper. if you’re a slow ice cream eater, like dw, hopefully no leaks!

serve with ice cream

BAM!

Strawberry Ice Cream + Almond Waffle Cones/Bowls

other cold treats:
morestomach — spice coconut pecan
morestomach — coffee chocolate chip
morestomach — peppermint chocolate chip
tutti dolci — blueberry cheesecake ice cream
lark & linen — cookies & cream popsicles

strawberries + cream pavlova

Strawberries + Cream Pavlova

it’s finally the hot season
maybe everyone else has experienced it
but for me
it’s reached fever pitch
and finally
the strawberry patches are opening
around these parts
it was a cold thirst around here,
temperatures keeping
the fruit from ripening
or growing
or whatever it is that they do
until they’re fully realized
i feel so behind this season
!!
like it’s a slow grab,
labored breath and all,
just to keep up
and then where to even begin?
what do i do with these
precious jewel hued gems?
oh you know,
something i’ve never tasted before
but forgiving enough in looks
to be passed off as rustic

Strawberries + Cream Pavlova

strawberries + cream pavlova
makes 4 very rustic pavlovas
as inspired by what katie ate & call me cupcake!

note: this is one of the easiest desserts ever. egg whites + sugar whipped into a frenzy and then baked. next time i make this, probably for blueberry season, or peaches, i would cut back on the sugar. use your best judgement, defer to how sweet the berries are already.

6 egg whites, at room temp (though separate them while cold, it’s easier that way)
1 scant cup of sugar (i used raw sugar which has a lovely brown tint to it, if you want your pavlova snow white, use white sugar. also, this is plenty sweet, cut back if you want)
1 tsp white vinegar
1 tsp corn starch

for whipped cream:
1 pint of heavy whipping cream, i used Organic Valley though Natural By Nature would’ve been more ideal. for a dairy free option, use canned full fat coconut milk. the night before serving, put can of coconut milk in fridge. section off just the top fatty portion of the milk
a few tsp of powdered sugar

1 cup of washed & chopped strawberries
lemon zest, optional

preheat oven to 350F, take out middle rack, leaving just the bottom rack.

on parchment paper, measure out how big you want your pavlovas. i used a jar lid as guidance. give the pavlovas space, as they do spread out while baking. flip parchment paper over on cookie sheet, your penciled outline will still be visible. set aside.

in a mixer, whip up the egg whites until foamy at medium speed. slow down the speed a smidge and slowly add in the sugar until fully incorporated. you’ve reached perfection when you can turn the bowl over and nothing slips out. add in the white vinegar + corn starch and gently stir until fully mixed.

if you’re aiming for 4 pavlovas, mentally divide the batter into four and scoop out onto the outlined circles. with a large spoon or off set spatula, spread out the mounds. next time i’ll press down in the middle a little, to provide a good platform for the cream + fruit.

prior to putting in oven, turn it down to 250F. bake pavlovas for 1:15. at no time do you open the oven door. turn off the oven, do not open the oven door. allow the pavlovas to cool down, ideally overnight.

Strawberries + Cream Pavlova

when ready to serve, whip up the cream + powdered sugar.

to assemble:
the way i made this, it can serve 4 people (or 8 if sharing…) but instead, since it’s just me + dw, it serves us, on two different occasions.

first time: lay one pavlova on plate. dollop, generously, with whipped cream. top with sliced strawberries and sprinkle with zest, if using. add to that mess creation, another pavlova. dollop again with whipped cream, topped with sliced strawberries & sprinkle with zest. inhale.

2nd time: just as single serving, layered with whipped cream and strawberries.

BAM!

Strawberries + Cream Pavlova

other strawberry delights:
morestomach – strawberry sweet biscuits (vegan)
louise’s spis – strawberry mousse cake
pastry affair – roasted strawberry red wine popsicles
my blue & white kitchen – croissants + brie + strawberries
my name is yeh – rosemary ricotta blintzes with strawberry rhubarb sauce
hummingbird high – strawberry basil coconut cream puffs

spiced coconut pecan ice cream – dairy free

Spiced Coconut Pecan Ice Cream

for a few weeks now
dw & i have been doing the
100 push ups challenge
i saw this video
and coupled with dw’s desire to
do the challenge in general
we’ve been aching
and pushing
and upping
and challenging
it’s comical, almost
i’ll set aside my latest crochet project
turn down the tv
and we huff our way through

i wish i could say that
my arms are sculpted now
or that i’m so strong i could do
a full chin up finally
but i can’t
not when after we do our sets
we treat ourselves to cake
or ice cream
i think i’m more interested
in the actual completion of it all
rather than the possible
physical end result

thus far this year
that is the only form of exercise
we’ve been doing
there is talk of running again,
doing a race possibly
there is just always something
else to do
a project to undertake
a trip to make
a room to paint
an ice cream flavor to create

and so we make do
this thrice weekly routine
it’s never a pretty sight,
more like comic relief
but always done with great fanfare
and some kind of sweet reward

it’s still mild out
most nights we keep the windows
barely cracked
but as the temps increase
we’ll be making ice cream
frequently
this is our first flavor of the season
inspired by a childhood favorite
as well as a local parlor‘s
attempt recently

Spiced Coconut Pecan Ice Cream

spiced coconut pecan ice cream – dairy free

**NOTE: you can use any kind of nuts you want, and you can use any kind of mild ice cream base. sky’s the limit.

1 cup of chopped pecans
1 TBL honey

1 TBL brown sugar
pinch of salt

sprinkle of moroccan spice (that you won’t use all of, can be stored in jar for later use):
2 teaspoons ground cumin
1 1/2 tsp ground cinnamon
1 tsp ground coriander
1/2 tsp ground chili
1/2 tsp sweet paprika
1/4 tsp ground allspice
1/4 tsp ground ginger
1/8 tsp black pepper

preheat oven to 325F.

in a small saucepan, gently heat up the honey + half of the spice mix. take off the heat. place pecans in a bowl, pour honey spice mixture over them and toss until nuts are well coated. spread the nuts on cookie sheet, bake for 20 minutes, keeping an eye on them, stirring them every so often to promote even roasting.

remove from oven and cool for a few minutes

brown sugar + salt and sprinkle over the nuts, toss to coat evenly

ice cream base
2 cans of coconut milk
4 egg yolks
1/2 cup of sugar
1 cinnamon stick
tsp of peppercorn
1 TBL potato starch (optional)

heat up 1 1/2 cans of the coconut milk + sugar. stir to mix through. add in the cinnamon stick and peppercorn and allow to gently heat through

in a bowl, separate the yolks, keep the whites for another purpose (maybe meringue icing or a white cake? or in my case, an egg white omelet). next you’re going to temper the eggs. using a ladle, very slowly & gently pour the hot coconut mixture into the bowl of yolks, all the while stirring furiously. you are attempting to bring the yolks up to temp with the hot mixture, but not scramble them. you might need another ladle-ful. when the yolks are warmed through, pour into the saucepan and continue to stir, keeping temp an even low heat. meanwhile, using the remaining coconut milk, add in the potato starch and mix though. it will thicken a smidge, but the purpose of the potato starch is to discourage icicles from forming in your ice cream in the freezer. pour mixture into saucepan and just continue to stir. the mixture will be thick. remove from heat and allow to cool.

when thoroughly cooled, strain through a fine mesh seive to catch all the peppercorns & cinnamon stick. cover and refrigerate overnight.

next day, pour into ice cream maker and whirl according to your maker’s specifications. in the last 2-3 minutes, add in your nuts and allow to churn & mix through. can serve right away, or allow to freeze/solidify for a few hours.

BAM!

Spiced Coconut Pecan Ice Cream

you guys, a one year ago this month i started this space. thank you so much for reading along.
asparagus + scrambled egg salad tartine
homemade thin mints
Portuguese Chicken Curry with Chorizo + Olives
dutch oven bread

japchae – vegan

Japchae

most saturdays you’ll find me
unshowered at 3pm
no judgement please
if we don’t go out
i won’t shower until bedtime
it’s usually a battle of
doing something
or
doing nothing
what ends up happening is
something gets started
i get bored
and nothing is finished

currently our spare room
is empty of its usual dressing room fixings:
vanity
mirror
dresser
water cooler bottle that holds all our change
window curtain
all that shit is
in the hallway
the fire marshall would have a fit,
if we had a fire marshall

spackling
choosing paint
priming
choosing paint
more priming
eventual painting
it takes time
and the concentration
and determination
of a warrior to complete it

guys
i am no warrior
instead i paused partway
and went into the kitchen,
not emerging until dinner time
the room may still have naked walls
i may walk into the room to grab undies
only to backtrack into the hallway to grab said undies
i may have skipped the whole painting step
and started on the whole decorating step,
a step i’m sure i’ll leave incomplete, ahem,
but damn
dinner was done
and in fact,
it was dinner for 3 nights
bam!
fine. you can call me part-warrior

Japchae

japchae – vegan & gluten free
makes about 5-6 servings

*note: i don’t know if this authentic or not, this is just a guess based on the various times i’ve had it at restaurants etc. the vegs were in the pantry waiting to be used up, make use of whatever you have on hand or whatever is in season. i used tamari to keep it gluten free but soy sauce is fine too. personally, i liked this much better as a leftover than fresh.

1 package of korean sweet potato noodles
3 zucchinis, sliced into thin strips
3 carrots, peeled and cut into match sticks
half a medium onion, sliced
2 stalks of celery, diced at an angle (optional, dw likes fancy knife work)
3-5 dried woodear mushrooms, reconstituted in hot water, and then sliced thin
splash or two of soy sauce or tamari
drizzle of sesame oil
toasted sesame seeds, for garnish
oil for frying

cook up the noodles according to package instructions

in a big pot or pan, heat up some oil, whatever you wanna use, i used olive oil. add in the onions and carrots. saute for about 3-4 minutes, or however soft you want your carrots to be. next, add in the wood ear mushrooms and celery. at this point, add in a splash of soy sauce or tamari

add in the noodles AND zucchini strips, stir until everything is well mixed and the zucchini has been warmed though and has softened. add another splash or two of soy sauce or tamari, toss it till it’s mixed though

at the last second, drizzle in sesame oil to coat through. this is for fragrance mainly, not so much for taste. garnish with a sprinkle of sesame seeds.

bam!